Wednesday, December 29, 2010
Herbs For the Hair
What herbs do I need or could my hair benefit from? There are so many herbs out there that serve what seems like a never ending purpose. Here are some herbs that are great for the hair!
Enjoy!
Lavender- scent, stimulate hair growth
Lemon- hair lightener, shiny hair, scalp refresher, oily hair
Lemon Balm- scent and stimulate hair Growth
Lemongrass- scent, dandruff, oily hair, dandruff, hair volume
Clary S
age- dandruff and hair growth
Thyme- darken hair, dandruff and silky hair
Ylang-Ylang- scent- hair tonics
Basil- provides scent, improves hair growth and assists in de-tangling
Burdock Root- Add to shampoos, conditioners and rinses for dandruff and hair loss
Calendula- good for blondes in shampoos, conditioners and rinses
Clove Buds- Brunettes and red heads
Cornflower- blonde gray and white hair rinses
Fennel Seed- scent shampoos
Rose- dry hair, scent,
Rosemary- hair growth, scent, darken gray hair, hair loss dandruff, remove excess oil
Nettle- antibacterial and anti fungal, astringent, dandruff, add shine, hair loss, grey hair prevention, conditioner
Southernwood- hair loss, hot oil treatment for dry hair with EVOO, brings out highlights
Watercress- Thick hair
Kelp- Oily hair, promotes shine
Patchouli- Dandruff
Plantain- dandruff
Red Clover- dry damaged hair
Frankincense - scent
Peppermint- scalp stimulator and hair growth
Green and Black Tea
Witch Hazel Bark- dandruff, remedy oily hair
Tea Tree- dandruff, prevent head lice, anti septic
Sandalwood- adds shine and scent
Eucalyptus- dandruff
Henna- natural dye, conditioner, hair strengthener, adds body and shine, cleanses scalp
Hibiscus- reddish tint, good for dry hair, conditioner hair growth and treat dandruff
Aloe Vera- moisturizer and conditioner. Also gel provides hold
Geranium- add to shampoo/conditioners/rinses for oily hair
Ginger root- antibacterial, anti-inflammatory, antibacterial
Horsetail- strengthen hair, oily hair and dandruff
Marshmallow Root- nourishing for dry hair
Essential Oils:
Chamomile
Juniper
Lemon
Lemongrass
Jasmine
Rose
Rosemary
Ylang-Ylang
Saturday, December 25, 2010
DIY Herbal Rinses
As I have mentioned before, an infusion is steeping your herbs in a oil or water. There are also decoctions(Bark & Roots), etc. So I will be using my left over Ayurvedic powders to create post shampoo rinses, herbal waters for creams, shampoos, etc and oil infusions, thus keeping to my challenge( I'm not a quitter)!
There are three types of rinses that you can create: Herbal Tea Rinses, Herbal ACV, and Herbal Hair Rinse(Tea and ACV)
Rinses are to be used post conditioner. They help add shine, smoothout the cutilce, soften hair, remove soap residue, restore hair ph balance and assist with hair managability.
Think about it as making a tea. You can either just dump the powder straight into the water and strain later(using cheesecloth) or use a tea bag/mesh infuser to make this infusion.
Herbs For Hair
Ayurvedic Herbs For Hair
Water Infusion Instruction:
1 cup Distilled Water
1-2 tablespoons of dried herbs(2-4 tbs fresh herbs)
1/2 cup AVC (optional depending on your herbs)
1/2 cup AVC (optional depending on your herbs)
( The rule of an infusion/decoction is 1 part herbs to 8 parts water)
- Bring Water to a boil and then add powdered herbs/tea bag
- Reduce heat and let simmer for 10-20 minutes. (Keep pot covered)
- Remove infusion from the heat and let cool
- After the infusion has cooled strain out the herbs using cheesecloth or remove the tea bag
- Add your ACV and essential oils if desired now and stir.
- Pour into clean glass jar of choice.
Keep refrigerated and it is best to use within the next four days!!
ACV Herbal Rinse
2 cups apple cider vinegar
1 cup chopped fresh herbs or 1/2 cup dried herbs
- Pour ACV into clean glass jar and add herbs of choice.
- Store in refrigerator and shake jar periodically for 2 weeks
- Strain herbs from ACV and it's ready for use.
Application:
- Take 2 tablespoons of Herbal ACV and add to 1 cup of water.
- Use as a post shampoo/clarifying rinse
Refrigerate for up to 6 months!!
Enjoy!!!
Tuesday, December 21, 2010
Oil Cleansing Method (OCM)
Ingredients:
60% Castor Oil (deep cleanser)
20% Grapeseed Oil (antiseptic)
20% Jojoba Oil ( waxy oil that is very similar to natural oils produce by skin)
(Adjust the amount of Castor Oil used depending on skin type, i.e. dry skin uses less and oily skin uses more)
Oils by skin type: (courtesy Moptop Maven)
Oily, Acne Prone Skin: Grapeseed Oil, Hazelnut Oil, Jojoba Oil, Flax Seed, Neem Oil, Sunflower Seed Oil
Dry, Mature Skin: Evening Primrose Oil, Olive Oil, Avocado Oil, Apricot Kernel Oil, Sunflower Seed Oil
Sensitive Skin: Meadowfoam Oil, Apricot Kernel, Rosehip Oil, Sunflower Seed Oil
Essential oils by skin type
You can also add essential oils for smell and/or for your skin type or create an infusion, i.e burdock root for sensitive skin, psoriasis and eczema
Instructions and Application:
I mixed these ingredients in a jar and I was done. Easy Peesey Lemon Squeezey!!!
Massage oil into face and let sit for 1-2 minutes. Let a clean face towel run under HOT water. Squeeze out excess water and let sit on your face until the towel cools. I did this 3x because, I felt 1x wasn't enough and left my face feeling oily and covered. Wipe face and rinse once with cool water!
After application, I felt a cool feeling in my pores, like they were so fresh and so clean and could feel the breeze.
After washing I sprayed Thayer Witch Hazel and Rose Water Toner on a cotton swab and rubbed that across my face. This will help clear away any dirt missed, while toning those pores!
Then I applied Jojoba oil and wiped the access oil off with another cotton ball.
FYI: I chose the jojoba oil because it is supposed to be very similar to the sebum that our skin produces naturally and is recommended for oily skin. After two days of using Jojoba oil I switched to Grapeseed oil, because I found the Jojoba oil to be too heavy for me.
Each oil you use should be according to your skin type ( dry, sensitive,oily)
I am going to try this cleansing method for a while and see how I feel. It's supposed to help give your skin a great glow, which I would love! I like to imagine the oil lifting all the dirt out of my pores, while I'm cleaning.
What I must say is different about this method of cleaning, is that my face does not have that traditional stripped dry feeling afterwards, which I know is better for your skin, especially the oilys.
Enjoy!!
Wednesday, December 15, 2010
Castile Soap and DIY Goodness!!
Article Courtesy of The Simple Green Frugal Co-op
As you start to research homemade soap or shampoo recipes you are probably going to notice that castille soap is almost always an ingredient. That's because it's so versatile and because its readily available in most health food stores, natural food stores and online.
So what is castille soap? Originally an all-vegetable based soap was made in the Castile region of Spain from local olive oil. Now a days "Castile" refers to any vegetable oil-based soap, versus animal (tallow) fat-based soap. Dr. Bronner's makes a "Pure-Castile" guaranteeing that what they are using is a real ecological and simple soap, not a complex blend of detergents with a higher ecological impact due to the waste stream during manufacture and slower biodegradability.
What can you use it for?
1. Soap you can use it as is as hand soap or body soap. I find the full strength to be a bit much so I dilute mine with water. I save some money and it is just as effective.
2. Shampoo
3. Toothpaste. I have never tried this but supposedly you can use a couple drops and it works. Has anyone tried this? Thoughts?
4. Laundry. 1/3 to 1/4 of a cup in a regular load of laundry.
5. Pet shampoo.
6. Aftershave.
7. Vegetable/fruit rinse.
8. Pest spray. 1/4 oz to 1 Qt water.
9. Massage oil. I got this from Dr. Bronner's site and I have to say I'm not sold on using soap as a massage oil.
10. Cleaning- counters, floors, etc 1 part castille soap to 40 parts water for light cleaning or 1 part castille soap to 20 parts water for heavy duty cleaning.
11. Dish soap.
12. Shaving lather.
13. Bubble bath
14. Carpet Stain remover. A drop or two on a clean damp towel should do the trick.
15. Cleaner/Disinfectant. 1 part white vineger 3 parts water and a squirt of castille soap and off you go.
16. Face Wash.
17. Clean makeup brushes. I imagine you could use it on things like paint brushes as well.
18. Wood cleaner. A drop on a microfiber cloth will do the trick.
19. Foot soak. A capful of soap into a basin of water will ease your tired feet.
20. Backpacking. Because it is so versatile and biodegradable you can take one small bottle with you and use as needed without worrying about what you are putting into the water.
There you go I thought of 20 different uses, are there any I missed? If you use castille soap I'd love to hear your thoughts.
Enjoy!!
Monday, December 13, 2010
Shoe Clips!!!
Do you have a pair of shoes that you sometimes wish, weren't so plain or are you looking for a new look? I found a cool website, shoeclip.biz. Thx Stylish Curves!
I have a hard time finding black flats I like, that are not so detailed and/or specific that I cannot wear it with many outfits or so plain and boring that I hate them, so I might try this out and see, It's like owning a bunch of shoes, but not really. Bedazzle your shoes, LOL!!
I know this isn't exactly DIY, but it's cool, right! Fashion is so much fun and this allows you to play around with it instead of searching the Internet, boutiques, etc for THAT shoe!!
Enjoy!
Henna Application
I did my first Henna application this weekend using the Curlynikki method!!!
For an explanation of the ingredients go to the post about Ayurvedic Herbs & Oils.
Ingredients:
75 g Jamila Body Art Quality Henna
25 g Amla Powder
100g Indigo
Honey
Distilled Water
3 Green Tea Bags
First I mixed the amla and henna with green tea and covered with Saran Wrap while I co-wash and detangled my hair.
Henna Powder Henna Mixed with Green Tea
Then I mixed the indigo in a separate bowl and then added it and honey to the henna. I the applied the paste to my hair and thoroughly coated my hair. ( I didn't let the henna sit overnight prior to application because I didn't really have time and Curlynikki method purports the dye to release while applied to hair)
Indigo Powder Indigo and Henna being Mixed
( Sorry I forgot to take pic of Indigo paste)
I then wrapped my hair in Saran Wrap and then put a shower cap with a headband around the edge.
I then slept in the mixture and rinsed the next morning by dunking my head in my tub ( I clogged the tub LOL, It looked horrible and my uncle just looked at the water and then at me like WTH is this, SMH)
Anyhoo...After dunking my head in the water I finished rinsing out the paste and applied a deep treatment and sat underneath a dryer for 1 hour, then rinsed and did a basic ACV Rinse. I used Aubrey's Organics Rosa M. Conditioner ( I didn't really like it though, might add some stuff to make it better)
Before After
My hair didn't come out as I hoped, I think next time I will do the henna and indigo separately, or maybe give it another try since mehandi.com says that desired results will come after multiple applications. I will also give myself enough time and let the henna sit and allow the dye to fully release prior to application.
Hair is still wet, I will post updates and better pictures soon(I really need to find my camera charger), since they say it takes about three days to see the true results!
Enjoy!
Wednesday, December 8, 2010
What's in your beauty products and/or foods?
I know everyone at some point has tried to read the ingredients on their foods or beauty products and given up because they didn't know whet they were reading or knew how to even pronounce some of the ingredients. Instead we just read the purported benefits and just bought the products wishing for the best.
We as consumers sometimes turn a blind eye to the things we ingest and apply topically. Beauty is beyond the skin as we all know, so let's take care of our bodies, they are our temples!
Here is a website I found that tells you about Ingredients and rates their toxicity and danger to the body.
Environmental Working Group's Skin Deep Cosmetic Safety Database
Enjoy!
Tyra Banks - Vaseline Frenzy
I know she can be over the top sometime or all the time, but she does work in the beauty industry where beauty and perfection is key!!
Enjoy!
Benefits Of Vaseline (Beauty Secret)
The number one items marketed to women is beauty products that promise great looking skin, lips, etc with high price tags. What they don't say is that they are ridden with horrible chemicals that are really ineffective and/or damaging. They also don't tell you that the biggest ingredients in the products are petrolatum a.k.a petroleum jelly a.k.a. Vaseline or Mineral Oil (read and decipher your product ingredients).
I personally don't really use vaseline other than as a lip balm when there is nothing else around,lol. But a co-worker of mine uses it as a night treatment for dry skin and I also dated a guy that used absolutely nothing else and swore by it!
I actually prefer my unpetroleum jelly, so if your concerned about vaseline, then use my un-petroleum jelly recipe and still get all the benefits of vaseline listed below.
So stop paying all that money on Estee Lauder and at Ulta and Sephora beauty counters and go to your local grocer/drugstore and get your $6 jar of Vaseline! I know I will be buying some very soon, and maybe I'll try sprucing it up as a tinted lip balm!
FYI: I would not recommend Vaseline for hair since it coats the hair ,not moisturize.
50 ways to use Vaseline
(Courtesy of Christina Loves)
1. Put a coat on your eyelashes before you go to bed. Lots of people swear by this - and say it will make your lashes grow longer and thicker over time.
2. Put a coat of Vaseline on your feet at night, cover them with socks and wake up to softer feet - every day!
3. Put Vaseline on your elbows every day - they will stay soft!
4. Put Vaseline on your cuticles several times a day for softer and better looking cuticles every day.
5. Put Vaseline on chapped lips
6. Use Vaseline as lip gloss
7. Mix a little Vaseline with a little Kool-Aid powder and make a colored and flavored lip gloss!
8. Melt Vaseline and one chocolate chip in the microwave, mix and let re solidify for chocolate lip gloss!
9. Maintains perfume scent longer when applied at perfume points before spritzing the perfume.
10. Can be used as a moisturizer for acne sufferers (it is a misconception that it clogs pores)
11. Moisturizes severe dry skin
12. Use Vaseline on your knees to prevent that dry, ashy look
13. Mix with sea salts to make a scrub!
14. Applying Vaseline on your teeth prevents lips from sticking to teeth for celebrities and contestants in beauty pageants who smile a lot
15. Applied on teeth before applying lipstick prevents lipstick from sticking on them
16. Massage, baby!
17. Warmed up can be used as a night cream
18. Makeup remover
19. Protects skin exposed to adverse weather
20. Applied under eye shadow it can create a shiny effect
21. Applied on cheeks for a dewy look
22. Can be used to smooth and soothe skin after shaving
23. Used in manicures under cuticles
24. Gets rid of dry skin lines which can arise from washing
25. Lubricates ear lobes and helps to make earring insertion easy and painless
26. Keeps fingernails pliable and resilient
27. Use with your lipstick to create a cream blusher for your cheeks
28. Helps to ease off stuck on rings
29. Tames unruly eyebrows
30. Defines eyelashes and leaves them with a glossy and waterproof look
31. Conditions scalp pre-shampooing
32. Can help prevent chaffing
33. Aids with healing after cosmetic surgery procedures
34. Reduces scaling and itching associated with dandruff
35. Theraputic when applied to lesions caused by poison ivy
36. Can help improve condition of those with atopic eczema
37. Helps heal and protect new tattoos
38. Can protect against harmful hair dyeing, perming and straightening chemicals when used as a mask around the hairline
39. Use a tiny dab to put a quick shine on your shoes and bags
40. Smear a tiny bit on your hands and scrunch through your hair for a choppy look
41. Use just a touch on the ends of your hair to hide dry and split ends
42. Remove makeup stains from clothing
43. Rub Vaseline on the neck of your nail polish bottles and they won’t get stuck to the caps
44. Make your week old nail polish look new again - rub a small dab over the polish.
45. Use a touch of Vaseline mixed with powder eyeshadow pigment to make new colors, or a more solid eyeshadow that won’t get all over your face when you put it on.
46. Stretch your favorite lotion by mixing it with Vaseline.
47. Put Vaseline on your lips, leave it a few minutes, then scrub your lips with a toothbrush to exfoliate and leave them SO smooth
48. Remove false eyelash glue from your lash line
49. Apply a small amount on dry spots on your body before fake tanning lotions are applied, and prevent uneven tanning!
50. Generously apply Vaseline all over before taking flights to combat associated dryness
And just for fun, this one is totally not beauty related, but VERY timely - here is #51:
Once you carve your Halloween pumpkin, rub Vaseline on the exposed edges. it keeps it from rotting or going dry.
Enjoy!
Tuesday, December 7, 2010
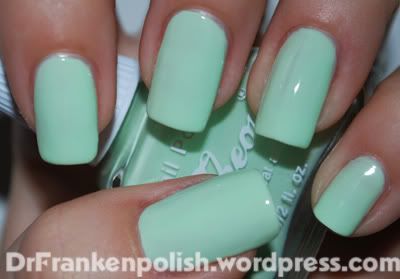
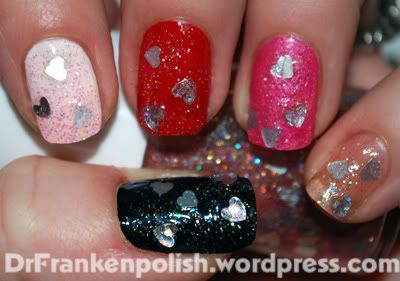
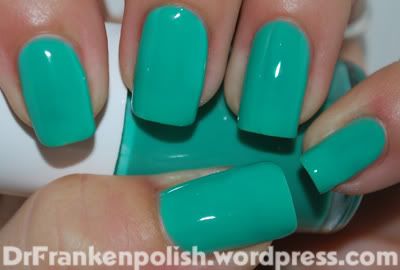
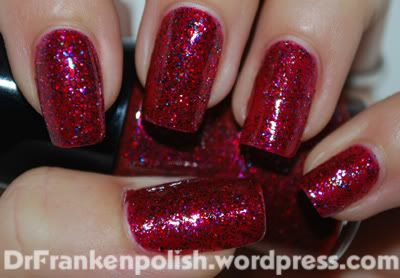
DIY Nail Polish
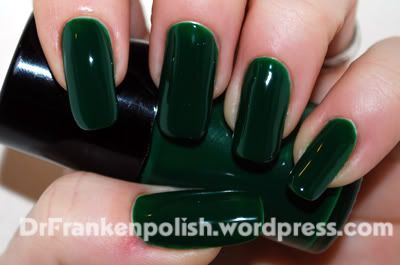
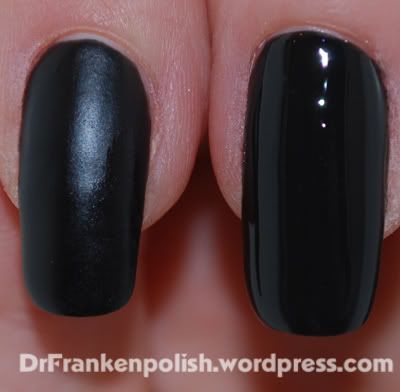
A few days later I found frakening. Frakenpolish is when you create your own polish using different ingredients.
Follow this link for Frakenpolish 101 from the blog, Dr. Frakenpolish.
Some photos below from Dr. Frakenpolish:
Enjoy!
Monday, December 6, 2010
DIY Body Butter
Well, I can't speak for everyone, but the COLD weather has officially arrived to Chicago. UGH!! And what comes with cold weather....dry skin. So, I decided to create my own rich body butter.
Ingredients:
- 2oz Shea Butter
- 2oz Mango Butter
- 2oz Cocoa Butter
- 3 tsp Apricot Oil
- 1 tbs Aloe Vera Gel
- 1 tsp Beeswax (grated or pearls)
- Lavender Essential Oil/ Fragrance Oil of Choice
- 1/4 tsp Vitamin E Oil (preservative)
- Clean Empty Jar ( i used one from a previous store bought cream, it's good to save jar FYI; economical and green)
Instructions:
Take all the ingredients and place them in a microwave safe bowl ( except the Fragrance Oil). Place measuring cup in a pot/skillet with boiling water. Let ingredients melt and stir. When melted, stir in EO or Fragrance Oil and whip. Pour mixture into clean jar and let sit overnight.
Note: If you use the microwave, make sure all the beeswax pearls melt.
Voila!
My Results, Enjoy!
The jar was too large, but I wanted to make sure I liked this recipe before I made larger amounts.
Once the Butter Set
The butter will melt in your hands and once applied to the skin. My next batch, will try to make it creamier. It felt very rich and smooth on my skin. Great for the 9 degree weather here!
Ms. DIY
DIY Lip Balm and Stain
(sorry for pictures, I used my iPhone because camera was dead)
As with dry skin, come dry lips in the cold weather. This recipe will give you shine and color, plus protection against the cold weather.Ingredients
1 tsp Cocoa Butter
1 tsp Almond Oil
1 tsp Beetroot Powder
1/4 tsp Beeswax (grated or pearls)
Lip Balm Jar ( I used old 1/2 ounce body glitter jar I had, green and economical)
Instructions:
Place ingredients in a glass measuring cup (except beet root powder). Place measuring cup in a put/skillet with boiling water. Let ingredients melt and stir. Add in desired amount of beet root powder for desired results. Pour mixture into clean jar. Let balm set and use!
Voila!
The results were very rich and smooth on the lips. Felt really good and soft. I would suggest a good lip exfoliation and then applying this after. I only wish I had used more beet root powder to get the sheer red look and a little less beeswax. Next time!
- in attempt to soften and darken color I reheated the lip balm in the microwave an added beetroot powder. FYI: Do Not use microwave at full power or at all. It will overcook your butters, thus causing it to become grainy,Lesson leraned. Invest in good double boiler.
Enjoy!
Subscribe to:
Posts (Atom)


