Showing posts with label Skin Care. Show all posts

Wednesday, December 28, 2011

DIY Lip Products Summary

I have made several different posts about  making lip products so here is a summary and links to all my posts regarding creating your own lip products.

Depending on your preference and desired results, there are several different methods of lip product application and several ways to create formulas.  The possibilities are endless depending on your favorite ingredients.  Whether you are keeping it sipmle and just using oils and wax or adding the more complex conditiong aagents like cetyl alchol or want a harder product, etc.  See here for possible lipstick formula and comercial comparison. 

Typical Natural Lip Product Ingredients:
  • Carrier Oils
    • Castor oil for shine
  • Lip Safe EO
  • Flavoring Oil
  • Sweetners (Honey, Glycerin, Stevia)
  • Butters
  • Waxes & Emulsifiers
    • Beeswax, Candelilia wax, Caranuba wax (higher metling point), Polysorbate # etc
  • Lanolin
  • Complex additives
  • Preservative/Anti-oxidants:  Currently only parabans are approved-go figure.  Plus, many popular natural brands only add antioxidants (vitamen e oil & rosemary extract, etc)
    • I have read people recommend phenexthanol products, but in my research I get conflicting info about toxicity regarding lip safety so, I'm staying away from it.  Keep in mind much of our lip procucts are ingested due to its location.  I know we aren't literally eating our lip stick but hwo doesn;t lick their lios on a occasyion or eat/drink while wearing lip gloss...anyhoo!
  • Color additives
  • Stick base- Versagel
If you don't want to bother with creating your own base, just buy one.  Several companies out there make lipstick, lipgloss and lip balm bases.  I am currently only making my own because I have all this dang beeswax to use, lol!

Methods of application
  • Lip Gloss
  • Lips Stain
  • Lip Balm
  • Medicated Lip Balm
  • UV Potection Lip Balm
  • Lipstick
  • Liquid Lip Colors (new trend)
    • sort of a lipstick and  Lip gloss hybrid
Product safety:  To be safe discard products every 2 weeks(pots)-2monthes depending on application method and oils used.

As always I recommed eliminating hand in jar and using sterile utensils during formulation. For your softer liquid formulas use pots, lip gloss tubes (squeezies and brush applicators), roll-on bottles.  If using a lip pot, use a lip brush (keep clean) or disposable q-tips or lip brushes.  For your harder recipes use lip balm and lipstick tubes.


Lip Blam Recipes:  here, here, here
Lip Gloss Recipes; here
Coloring Lip Products

Resources:
How to sterilize your area and utensils

Tuesday, December 27, 2011

Solid Perfumes

HOW TO DIY Solid Perfume

Materials
  1. 1 1/2 teaspoon jojoba oil
  2. 25 drops of four essential oils you like (approximately 5-7 drops of each oil). Since wax dulls the scent of many perfume top notes, use a stronger concentration of these—common top notes are citrus and ginger.
  3. Generous 1/2 teaspoon grated beeswax (available at health food stores or online)
  4. Eye Droppers
  5. Non-metal, heat-safe bowl
  6. Small cup
  7. Empty compact, pillbox, locket, or pocket watch necklace
Instructions
  1. Pour jojoba oil into your small cup. Add all the drops of essential oils and mix.
  2. In your heat-safe container, melt the beeswax over the stove top or 5-10 seconds.
  3. Stir the beeswax. After it's completely liquified, mix with the jojoba/perfume blend.
  4. Reheat the entire blend for just 10 seconds over the stove and continue to stir.
  5. Prepare your empty compact and immediately pour the finished mixture in.
  6. Let your solid perfume cool completely, then enjoy your new custom scent! The texture should feel like a soft lipstick or balm.
source

    Thursday, December 22, 2011

    DIY Lotion Bar


    I had all this lip balm left over from this recipe here, so I decided to add a little beeswax and make it into a lotion bar/ solid perfume.

    Ingredients:
    20% Cocoa Butter
    30% Mango Butter
    20% Beeswax
    22% Carrier Oil
    7% Lanolin
    .25% Vitamin E Oil
    .1% EO/Flavoring Oil optional
    .1% Sweetener ( Honey, Glycerin, or Stevia) optional


    This was the recipe that I used to create the lip balm above.  I crossed out two ingredients, because I previously listed those ingredients for personalization and I did not use those ingredients when I made my base. 

    To make the lotion bar I simply melted the balm base in a double boiler and added about 1.5 ounces beeswax.  When fully melted I poured mixture into a silicone mold, added .04oz EO Blend (2 sample sizes) of an EO blend I ordered from Essential Wholesale, stirred and let sit overnight.

    Note:  I had about 16ounces of balm base, so adjust beeswax amount accordingly or just use sample recipe below.

    Results:

    This bar is huge, lol, but it smells so good, I will be ordering more of those EO blends, I love anything with Neroli EO!  I made this with the intention of just trying out the lotion bar recipe, but I added so much EO that it doubles as a light solid perfume as well. 

    Here is a another simple recipe for a lotion bar as well.
    Ingredients:
    3 ounces beeswax
    2 ounces cocoa butter
    3 ounces sweet almond oil

    Enjoy!

    Wednesday, December 21, 2011

    Colored Lip Gloss #1


    Lip Gloss
    50% Lip balm
    50% Versagel
    10-20% Mica/Pigment/Dye of total lip gloss weight

    The more color the more pigmentation.  I am still learning about making my lip gloss more opaqie.  My goal is to create a creamy lip color.  Mica alone will color your lip gloss, but be tranluscent in application.

    To learn more about coloring your lip products go here

    As for this recipe it has good amount of shine and staying power.  I feel the gloss still on my lips after awhile.

    Enjoy

    Tuesday, December 20, 2011

    How to Color your Lip Products

    Depending on your desired results, there are a couple different ways to color your lip products.   It was hard for me to find this information in one location so I thought I would try and share my findings in ONE location, lol.

    There are basically three types of lip products you can make in regards to coloring, Opaque, Translucent, or Staining. 

    First what is used to color lip products & their differences:
    • Pigments- color additives that don't dissolve in product and kind of coats the lips; think paint.
    • Mica- natural minerals that add shimmer and shine
    • Dyes- color additive that dissolve and stain lips
    How can you obtain these results?

    Opaque
    • add Zinc Oxide or Titanium Dioxide to your color formulations ( also provides UV protection)
      • come in powder and liquid forms, see here
    • Add more color:  add 10-20% of your lip product weight
      • See explanation of different coloring ingredients here
    Translucent
    • just add mica
      • Mica will color the gloss but will only add shine and sparkle to your lips during application
    Staining
    • add dyes, think Easter eggs or the current lip stain trend
    When looking for your color additives please make sure they are lip safe and approved.  Also, look at the ingredients, some colors may very well be combinations of dyes, pigments and mica already. 
    See below for suppliers!

    Depending on the planned application method of your lip color will determine what color additives are needed.  According to TKB Tradings:

    "Here's the bottom line: A liquid lip gloss will be colored only with dyes. A solid lip pencil will probably be colored only with pigments. Meanwhile, the typical lip balm/lip stick will usually be colored with a blend of dyes, pigments and micas so as to get the best of all worlds. In total, the color portion of a lip products recipe will usually be about 10-20%."  Source


    Suppliers:  These are the only places I have ordered from
    Other known Sources I've seen used
    • Mac Pigments
    • Eye shadows & Pigments 
      • The trick w/using store bought pigments is knowing if they are lip safe.

    Sources- I do not take credit for this info, just wanted to share my findings all in one place
    TKB Tradiing
    SoapQueen

    Thursday, November 17, 2011

    Lip Balm/Gloss Experiment

    Since my hair is all braided up and honestly I have kind of tired of creating new products for my hair and skin ( body & facial cleaners) I have moved onto lips and nails, makeup and possibly candles!

    This post is about lip products.  I've been cooking up some ideas and it's time to test them out now that I have ALL the supplies!

    Soon I will be making all these types of lip balms & Lip colors below:
    1. Lip Balm (Base)
    2. Lip Balm w/ Castor Oil & Mica
    3. Lip Balm w/ versagel & Mica
    4. Vaseline w/ mica
    Supplies Needed:

    Equipment                                                                                             Ingredients
    • Double Boiler                                                                                Shea Butter
    • Lippie containers                                                                           Mango Butter
    • Alcohol                                                                                         Cocoa Butter
    • Wooden Spoon                                                                            Cocounut Oil
    • Toothpicks                                                                                   Castor Oil
    • Container for base Lip Balm                                                          Beeswax
    • Melter Cups                                                                                 Candilia Wax
    • Scale                                                                                            Lip safe Mica & dyes
    • Measurement Spoons                                                                   Versagel
    • Patience & Time                                                                           Vaseline
    • Coffee Grinder/Pestle & Mortar                                                    Rosemary Extract/Vitamen E Oil
                                                                                                             
     
    Man!!  This seems like alot of work, but I'm impatient and I want to test out all these theories and decide on my favorite one for lip application.  I am always interested in saving money so, some would be a cheaper habit to maintain than others, i.e. Vaseline.   I am testing for feel, staying powder and pigmentation. 

    As for the preservative, I say this is optional, but if you decide to opt out, try to make formulation for jars that do not require as much hand in jar or lip brush contamination.  You can also just make small amounts and throw away left overs after so much time.  Plus, these formulation are water free, which generally do not require preservatives.  Be careful not to get water in balm/glosses.

    Stay tuned for my results!!

    This blog and post is meant for fun only, not for sell.  Please do your own research and practice GMP and learn about preservation.  These products were not tested for sell. 

    New Lip Balm Base

    This is my most recent lip balm creation.  It is the same as my previous recipe, except I added lanolin for it's moisturization and assistance w/ color adhesion in lip products.   

    20% Cocoa Butter
    30% Mango Butter
    20% Beeswax
    22% Carrier Oil
    7% Lanolin
    .25% Vitamen E Oil
    .1% EO/Flavoring Oil  optional
    .1%  Sweetner ( Honey, Glycerin, or Stevia) optional


    Results: This lip balm is great, but my intentions to use it as a base for my liquid(creamy) lip colors is not so great since I will have to reheat the base in order to add color and the versagel.  I only make 1 lip color at a time to avoid wasting product and to experiment while I am learning the tricks to coloring lip products.  The balm, due to the butters, crytalizes from too much heating.   If you just want to make a nice balm, this recipe is great as long as you melt the butters once and slowly.  It is very soft during application and offers a slight shine to lips and lasts.  You can also add color to tint this balm as well. 

    P.S  Add castor oil to make into  lip gloss.

    Creamy Lip Color recipe coming soon!

    Enjoy!

    Thursday, November 10, 2011

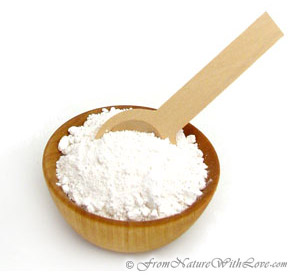
    DIY Oil Blotting Powder & Primer


    I have been testing a recently order primer sample for the past few days and I noticed at the end of the day, I didn't have shiny forehead.  I'm usually VERY shiny by the time I get to the gym, ugh!  So, this powder is a winner so far!

    Why am I posting this?  This is not a prodcut review, but rather a you can make this "product" at home for a fraction of the price. 

    The powders ingredients are....drumroll.....kaolnite.  Now isn't that just the INCI name for kaolin clay???  So of course I googled it to make sure my hypothesis was correct and BOOM it was.  According to Mountain Rose Herbs,  Kaolin clay is:

    Total Kaolinite- 97%
    Silicon Oxide- 46%
    Aluminum Oxide- 37%
    Iron Oxide- 0.79%
    Titanium Oxide- 0.37%

    So this 2 gram(.07 ounces) sample that I just paid $3.00 plus shipping costs about $4.00 for 8 ounces.  Shut the front door!  See this is why I give some natural companies the side eye, like really!?!  I found several companies that sold this very powder with varying ingredients for $12+ for kaolin clay in a jar w/ a sifter.


    Some other variations to this finishing powder/primer/viel include cornstarch, rice powder, arrowroot powder(sensitive to conrtsatrch), titaniam dioxide, etc.  There are some other minerals that can be mixed, but I don't plan on figuring out the correct formulas for using them.  For now the kaolin clay works fine, but when the summer hits, I may up the anty and add some other minerals or just purchase this one oily skin powder I got mine eys on, lol.  This powder has those above mention minerals I'm not trying to figure out proper formulations with at the moment.  (I'm currently in a just buy it mood right, now). 

    Long strory short, try Kaolin Clay as a great primer and oil blotting finishing powder that can be used alone or with makeup.

    Ways to personlaize:
    • Cornstarch
    • Rice Powder
    • Tinatinum Dioxide (UV protection)
    • Zinc Oxide
    • Arrowroot Powder
    • Brown Oxide(tinted color)
    • Learn about more ingredient options here

    Enjoy!

    Friday, November 4, 2011

    Tinted Moisurizer

    This is a great idea and you can use different lotion/cream bases of choice!

    Enjoy!

    Monday, October 24, 2011

    DIY Smell Goods

    Every time I Spray on my cologne, they be like girl what you got on,!!


    So I started looking into perfume (kinda guilted(sp?) into it,lol) and didn't want to use all the crazy chemical laden sprays and itchy creams that make me sneeze so I picked up my Aromatherapy book( need to buy another one, my current one is very limited).  I'm cool with smelling like lavender or some citrus-e like flavor,lol! 

    So in my research I found three natural ways to make your own natural smell goods: spray (infusion & alcohol based), solid, oil.  Out of the three, I have tried perfume oil and I'm not sure I did it right because the smell does not last at all.  I also  purchased a solid perfume from LUSH, which was NOT natural, ugh random purchases always get me!  Anyhoo, I will try making my own solid perfume soon.  I will not be trying either spray because I'm not trying to worry about proper preservation of water based products, finding 100 proof pure grain alcohol AND sprays make me sneeze.  Sprays seem to permeate around you ALL day,  that's why they don't allow you to apply any perfumes before laser eye surgery for example, lol.

    In this post I will explain the basics to making your own natural fragrance.  To learn about different recipes & application, visit here

    • Spray (water & alcohol based)
    • Solid Perfume
    • Perfume Oils

    How to:
    • You can either use fragrance oil or essential oils. 
      •  Fragrance oils tend to be synthetic, however I have seen some sellers say they have natural fragrance oils, but I'm not sure about those. 
    • First figure out what scent your going for, citrus, sexy, floral, relaxing, woodsy, spicy or a combination. 
      • Visit your local health foods store and smell all their EO's and absolute($$) to figure out what you like ( My new found love is Neroli)
    • Choose your top note, middle note and base note. 
      • Top Note: This is the scent you notice first, but it doesn't last long because it evaporates quickest. Top notes are a small portion of the final blend and include fresh, light citrus scents using such oils as bergamot, neroli, lemon, lime, rosemary, orange or mint.
        Middle Note: This links the base and top scents and determines the fragrance family. Middle notes include flowery essential oils, such as jasmine, rose germanium and ylang-ylang.
        Base Note or Fixative: This scent lasts the longest, adds fullness and carries the other scents. Derived from balsams, roots, resins and wood, bases include such oils as sandalwood, vetiver and patchouli and tend to be dark, heavy and sweet.
        When purchasing EO's websites/aromatherapy books will tell you what note they are and recommend other EO's to blend them with.
        • Some wholesalers do the blending for you and sell EO blends pre-made (find a local aromatherapy shop near you to help)
        • To keep things simple, you can use one EO, i.e. lavender to make your fragrance
    • Create your blend taking your time to test how every drop effects the fragrance
    • Choose your desired application method
      • Carrier Oil- Almond & Jojoba Oils are highly recommended & add EO/Fragrance oil
      • Alcohol
      • Water- will need preservative and emulsifier(or just shake before each application)
      • Solid Perfume (oil & beeswax)
    • Store Oil & Essential Oils in UV safe glass jar only
    • Let sit for 1 week to allow scent to strengthen optional

    Side note: I also found aromatherapy workshops/stores that make private appointment to assist you in creating your own personal fragrance blend.  They will then keep a file of your fragrance that you name and whenever you need a refill they make it for you.  Cool huh!


    More Resources & Sources
    DIY Natural Perfume
    http://www.livestrong.com/article/188351-how-to-make-natural-body-oils/

    Friday, October 21, 2011

    Ayurvedic Butter- Lazy Way

    Cold weather equals a need for heavier oils and/or butters, so here is the easy Ayurvedic butter I whipped up as promised!

     
    FYI- I call this the "lazy way" because I didn't make any of my own oil infusions.  Instead I used purchased Ayurvedic oils.

     
    I didn't really formulate/measure this, but just poured until my heart felt content so bear w/me.  Kicking myself for not taking the time to measure this recipe out, ugh!


    4 tbsp    Vatika Coconut Oil  (ayurvedic coconut oil)
    1/4 cup  Cocoa Butter         
    1 Cup    Shea Butter            
    1/4 Cup Mango Butter         
    1/3 Cup Bringraj Oil            
    1/3 cup  Jojoba Oil & Almond Oil Blend w/ Grapefruit & Lavender EO
    1 tsp      Vitamin E Oil         
    1tsp       Veggie Glycerin     

    I didn't want this butter to be to oily so I tried to keep the oilier oils to minimum.

    Instruction:

     
    1. Soften cocoa butter in double boiler
    2. Measure & add each ingredient and add to glass or metal mixing bowl
    3. Using hand mixer, blend ingredients until butter is soft in fluffy
    4. Place butter in clean and sterilized jar for storage.

     
    Be careful not to get water in butter to avoid mold.

     
    I have used this butter for twist outs, mini twist, sealing my end, as a pomade and for my skin when in a rush lol!!  And it Rocks!

     
    Enjoy!

    Friday, September 2, 2011

    Ayurvedic Butter Pomade ( Hair & Body)

    I got inspiration for this recipe from my Ayurvedic Shea Butter Hot Oil Treatment post and going through my stash and finding all these un-used herbs and oils.  This recipe can just be used for fun to switch up your usual butter recipes, on occasion!  I usually don't like to use shea butter on my hair, but I'm going to give it another try since I might have been a little heavy handed before in application and as you know, a little goes a long way with Shea butter, lol!


    Formula:

    Phase 1

    Coconut Oil  5%
    Castor Oil  5%
    Shea Butter 60%
    Mango Butter 3.7%
    Bringraj Oil  10%
    Jojoba Oil Infusion (Nettle,Hibiscus, Brahmi, & Amla)  15%

    Phase 2
    Vitamin E Oil 1%
    Rosemary Extract  .3%
    Other Oils for making an Infusion: Coconut Oil, Olive Oil, Almond Oil, Grapeseed Oil', Sunflower Oil, Flax seed oil, Sesame oil

    Instructions:

    1. Make Herbal Infusion (1 cup dried/powedered herbs and 8oz Carrier Oil)
      1. Using a double boiler gently heat the oil and herbs for 2 hours, stirring occasionally with stainless steel spoon    Make sure heat is low so as not to cook the herbs and oil, thus causing rancidity.
      2. Let cool and then strain infusion and place in cobalt glass jar, label with date. ( Keep Refrigerated or in cool area)
    2. Measure out each oil using a digital scale and place into stainless steel bowl.
      1. For example, jojoba oil 23.4% of 4oz would = .94oz. 
    3. Place Oil mixture into double boiler and add butters.  Let mixture heat on low until butters melt.  Not too hot though
    4. Measure out each part of phase 2 and place into stainless steel bowl
    5. Let oil mixture cool a little and add Vitamin E Oil, Stir
    6. Add Phase 2, Stir
    7. Allow mixture to cool and place into sterilized jar.  Label with date. 

    I would make small amounts, especialy due to the herbs. My formulations are for my fun and have not been tested for sell, etc.  Please practice GMP and avoid getting water in pomade to avoid mold!

    Enjoy!

    Friday, August 26, 2011

    DIY Liquid Eyeliner

    The trick to staying as natural as possible with DIY recipes is to only make what you need.  Depending on what your making,  this can be a pain in the butt sometimes, but here is a simple and COOL idea I will be trying soon.  If you look at liquid eyeliners they typically have water as the top ingredient meaning they have some type of preservative in it. 

    Supplies Needed:
    • Pressed or Loose Eye Shadows (store bought) or Mica or Iron Oxide powders from places like Coastal Scents
    • Eyeliner Brush
    • Visine

    Very Cool and simple!

    More DIY makeup coming soon!

    I will begin learning more using this book The Complete Idiot's Guide to Making Natural Beauty Products

    Enjoy!

    Tuesday, August 16, 2011

    Un-Petroleum Jelly II

    This recipe is much "thinner" and great for hair "grease" formulations and a lighter/high shine lip gloss than my first un-petroleum jelly formula.  This formula is just a collection of different oils used with less beeswax.  I found that I liked this formula better for lip gloss and body application, but that is just my preference. 

    Instructions:

    Just follow the instruction from the Un-petroleum Jelly post! 

    FYI: How much beeswax needed changes depending on the oils/butters you use and your personal preference.  Some oils are heavier/than other!

    Formula:

    Phase 1


    Jojoba Oil   23.5%
    Castor Oil   25.4%
    Shea Oil      23.4%
    Beeswax     3%
    Vitamin E Oil 1%
    Coconut Oil 23.4%

    Phase 2

    Rosemary Extract or Vitamin E Oil  .3%
    Mica/Beetroot Powder optional
    Flavoring optional

    Note:  From experience, When adding mica,  for a transparent/sheer color effect add to lip gloss during cooling phase(still liquid like)  For more intense color, (like high shine lip stick) add after it has cooled (solidified).  I will make a post to show the difference soon!
     
    Try out different oil combos and beeswax amounts to see what works best for you!!


    Enjoy!

    Monday, August 15, 2011

    DIY Chafing /Diaper Rash Cream

    This is a cool recipe I found in one of my recent Internet searches!  This is good for those that are very active, runners, diaper rash, etc! You will find many renditions of this recipe on runners boards.

    Benefits:
    • protects skin from chafing
    • can help heal the skin
    • helpful with blister prevention.
    • Low cost and effective

    As mention before in other post, Vaseline is good for chafing and diaper rash, but here is a way to personalize or improve it and make your own cream!

    Ingredients:
    A& D Ointment 40%
    Vaseline 40%
    Vitamin E Oil 10%
    Aloe Vera Gel 10%

    Instructions:
    Mix equal parts A & D ointment and Vaseline
    Add vitamin E oil and Aloe Vera  oil

    While in the baby isle I decided to read the labels of the bottles and they were mainly petroleum jelly with A&D present in small amounts.  There were also chemicals listed I know little about or feel like typing out.  I also came across one that was cocoa butter based instead of petroleum jelly, Whoo Hoo....right?  Well as I read further down in the Inactive ingredients( at home, I might add) I found PARABENS, LOL!  Got caught up by the cocoa butter, but it gave me an idea(light bulb), Ha!

    Enjoy!

    Epilator Update

    So, I "recently" posted about the epilator here and how I was curious to use it.  Well, I purchased the exact epilator Naptural85 showed in her video on ebay for cheaper,lol! (it works fine)

    Anyhoo, I have used it twice, so here is my review:

    OUCH!!!,   But dang those results are good!

    So, the thing kinda hurts, but I got used to the feeling after the first few swipes and then it become tolerable.  So, it's a little bit of a shocker at first, but then it gets better.

    The "shave" last about 2-3 weeks and its great, because I'm lazy.  My armpits have even lightened.  Previously I was getting a dark circle, that I thought was due to the deodorant, but I guess I was wrong.  ( I only use natural deodorant fyi)

    So overall, I vote you give it a try and as I mentioned in my previous post, try using the baby gum numb stuff if your afraid of the pain.  I debated adding this, but I'm going to keep it real here, lol.  I'm going to keep it 100( I've been hearing this a lot from guys,lol).  The bikini line is a whole other story, OUCH, I couldn't take it (grimace).

    I wasn't sure if you wanted to see my armpits, so no pics for this post, lol!

    Enjoy, if you dare!

    Thursday, August 11, 2011

    Get Started Mixing!!

    I wrote this post as guest post on another blog, but I thought I should put it here for my followers!


    There are three simple ways to learn about DIY natural hair care:

    1.      Books
              a.       To get started making your own hair products purchase books about natural skin and hair care. (the expensive ones I got through inter-library loan)  My favorite books included a glossary about each ingredient and their benefits and shelf life.  Some books main focus is just recipes, while others explain the structure of hair, hair needs, etc.  There is no one book unfortunately, trust me I searched, but a few will help.
            From there you will learn the basic procedures of certain formulations and how hair products were made.  One of the biggest formulas that are used in hair care is emulsions (water + emulsifying wax + oils).

    2.      Online Resources ( blog, vlogs, forums, ingredients databases)
             a.       As you already know the natural hair care blogs, vlogs and forums are also a great resource.  A lot of what I learned is a combination of Google searches (blogs,vlogs,forums), books and natural ingredient wholesalers. 

     3.      Natural Wholesale Companies
             a.      Wholesalers are very helpful when you have questions about formulations, ingredients and explaining the purpose of each ingredient sold.  Many wholesale websites include their own formulary (recipes) and break down each ingredient explaining their purpose, shelf life, and formula compatibility ( oil-soluble vs water soluble, etc).

    Start reading labels of your favorite products to see what is in them (not your ingredients to avoid list, lol!) and before you know it, you will be able to break down the products key ingredients and understand the formulation. 


    Determining Freshness

    The best way to determine the freshness of ingredients is color, smell and texture.  If the herbs are dry and crumbly, they may be too old.   

    The freshest herbs are obviously those pulled straight from the dirt, but these are not great for formulating because they still contain water, which can cause mold in your formulations.  Because of this, dried herbs are best.  These herbs should be stored in dark cool places, preferably in amber jars w/ tight tops and labels (expiration date).  This will help the herbs maintain their potency.  If they are exposed to too much light and air, they will lose their medicinal properties and flavor.   

    Herbs typically last for 1-3 years depending on what type (leaves, flowers seeds, bark or roots) and what form (Ground vs. Whole) you are using.  Each serves different purposes and are easier to use in different formulations. 

    As for oils, they need to be stored in cool dark areas as well.  These too need to be stored in UV protective bottles.  Every oil has a different shelf life and can withstand different temperatures before they become rancid, so check their shelf life and label.  For example, almond oil has a shorter shelf life than most oils and will last longer if refrigerated and butters must be heated at low temperatures, otherwise they will become grainy. 

    Recommended Books:

    Beauty by Nature by Brigitte Mars
    The Holistic Beauty Book: Over 100 Natural Recipes for Gorgeous Healthy Skin by Star Khechara
    Natural Beauty Basics: Create Your Own Cosmetics and Body Care Products by Dorie Byers 
    The Complete Idiot's Guide to Making Natural Beauty Products by Sally W. Trew and Zonella B. Gould

    (These three are kind of technical (get from library), but give you general understanding, I really skimmed these)
    Beginning Cosmetic Chemistry
    Preservative Free and Self Preserving Cosmetics and Drugs Principles and Practices
    Preservatives for Cosmetics

    Favorite Wholesalers/Stores:

    Local: Whole Foods, Indian Grocery, Health Food Stores, Farmers Markets
    The Herbarie (Ingredients, Formulary, Preservatives, Antioxidant)
    FNWL (Recipes Database, Herbs, Oils)
    Essentials Wholesale (organic herbs, oils, butters)
    Coastal Scents (mica, fair trade oil & butters)
    Mountain Rose Herbs (organic; oils, clays, butters, herbs, tea, jars/containers, How-to’s, etc)
    Brambleberry (DIY soap resource, oils, butters)
    Texas Naturals Supply (butters, oils, formulation ingredients. Clays, etc)
    Sunburst Bottles (wholesale bottle distributor)
    New Direction: Aromatics

    See my Formulators Supplies Needed post to get you started!

    These are a few places that I have bought from and/or heard good things about and will order from in the future!

    Enjoy!

    Wednesday, August 3, 2011

    DIY Body Lotion

    I just found this recipe and it sounds promising.  I am so going to  try this recipe soon! 

    I wonder how long it will last though, with the current heat in Chicago, it will probably fair better in the refrigerator, but I wonder how hard it would become....won't know until I try!


    Body Lotion
    This is a great recipe that does not spoil easily without the aid of refrigeration. It makes about 2 cups of lotion.

    1 cup of aloe vera gel
    1 teaspoon of lanolin 1 teaspoon of pure vitamin E oil
    1/3 cup of coconut oil
    1/2 ounce of beeswax
    3/4 cup of almond oil
    Up to 1 and 1/2 teapoons of essential oil of your choice or more to prolong scent

    Place aloe vera gel, lanolin and vitamin E oil in a blender or food processor. Place coconut oil and beeswax in a 2 cup Pyrex measuring cup, microwave on high for 30 second and stir. Repeat in ten second blocks until fully melted.

    Stir in almond oil, reheating if necessary. Run blender at low to medium speed, then pour in melted oils in a thin stream. As the oils is blended in the cream will turn white and the blender's motor will begin to grind. As soon as you have a mayonaise-like consistency, stop motor, add essential oils and pulse blend. do not overblend Transfer cream to glass jars while still warm because it thickens quickly.
    This recipe was found in the Winter 97 issue of Handcraft Illustrated Magazine. The article was written by Amy Jenner

    What do you think?
    Source

    Enjoy!

    Monday, August 1, 2011

    Updated Skin & Hair Regimen

    Here is my updated Skin & Hair Regimen. 

    The reason behind the changes were the hot & humid weather here in Chicago and getting tired of too much product in my house and simplifying my regimen.

    Skin Care Regimen:
    • Wash Face 2x daily
    • Use Toner after every wash
    • Exfoliate 3x/week ( replaces 1 daily washing session)
    • Facial detox 1x/week
    • Use gelatin mix whenever I remember
    • OCM to remove makeup only
    • Moisturize body w/ Skin Oil
    • Moisturize Face w/Aloe Vera Gel
    • Use MOM's as primer & oil mattifier occasionally when wearing makeup
    Skin Products:
    Witch Hazel
    OCM ( only use at night to remove makeup)
    Cleansing GrainsII, I (exfoliation) 
    Bentonite Clay
    Aloe Vera Gel ( facial moisturizer)
    Herbal Spritz or Rosewater w/glycerin (sets makeup, toner, and moisturizer)
    Skin Oil
    M.O.M

    Hair Regimen:
    • Wash 1-2x/month
    • Lightly french twist 1-2x/week
      •  to stretch natural curl pattern
    • Rinse hair 1x/week w/ water 
      •  remove sweat from working out
    • Twist outs whenever I feel up to it or special occasions
    • Protective styling every 2 weeks
      • wigs, crochet or mini twists ( I get bored easily)
    • Moisturize and seal hair daily with Water and Hair Oil
    • Henna occasionally
    Hair "Products'
    Bentonite Clay Wash 2x/month
    Flaxseed gel (when hold is needed)
    Water (moisturizer & refresher)
    Hair Oil ( sealer & moisturizer)
    Hair Pomade ( styler)
    Jamilia BAQ Henna


    I have really simplified my hair regimen, not my skin regimen so much.

    Enjoy!

    Saturday, July 30, 2011

    Skin Oil

    This oil is light and non greasy; great for hot summer months!  I suggest you use this oil immediately after your shower/bath, DON'T towel dry!  You can just seal in the moisturizing water and air dry.   In the colder and dryer months add heavier oils like castor oil, coconut oil and shea oil. 

    This oil is very healthy and good for your skin and you don't have to worry about the necessary preservatives used in lotions( water based products).

    Formula:

    40% Avocado Oil
    50% Almond Oil
    10% Jojoba Oil

    FYI:  Each of these oils can be used individually for your skin also

    Enjoy!