Monday, September 27, 2010

Grapefruit Moisturizer

This recipe is for oily skin types in the fall.

Ingredients:
  • 1 tablespoon cottage cheese
  • 1/2 egg yolk
  • 1 tablespoon honey
  • 1 teaspoon unsalted butter
  • 1 tablespoon grapefruit juice
Instructions:
  1. In a blender combine cottage cheese, egg yolk, honey, and butter.  Mix until creamy smooth.
  2. Add grapefruit juice and blend
Apply in the morning and occasionally at night if feeling dry.

Keep Refrigerated!

My results! (including eye glasses)

Lemony Sweet Moisturizer


This recipe is good for oily skin in the fall!!  (recipe from the book Return to Beauty)

Ingredients:

  • 1 small lemon
  • 1 tablespoon of plain yogurt
  • 1 teaspoon of vegetable oil
Instructions:
  1. Cut lemon, but do not remove skin
  2. In a blender combine ingredients and mix until creamy.
Apply morning and evening after cleaning. 

Refrigerate all leftovers.

Warning!  Allow time for blender to puree lemons and create a creamy moisturizer.  Otherwise the cream will be chunky.

My Results!

Apple Cleanser

Great exfoliating cleanser for oily skin ( most of my recipes are for normal-oily skin because my friends and I skins are very similar)  If you have a different skin type, let me know and I can find some recipes)

Ingredients:

  • 1/4 apple juice ( contains malic acid,, and excellent exfoliater)
  • 1 teaspoon baking soda
  • 2 teaspoons plain yogurt
Instructions:
  1. In a blender add ingredients and blend until creamy.
Application
  1. Wash face with this cleanser in the morning and evening.
  2. Rinse first with warm water and then rinse with cold water
Keep Refrigerated!
My Results!!

Don't Forget Your Scalp!!


Fall is hear and in Chicago that means cold temperatures and WIND!!!  For those ladies thinking about getting a protective style i.e. braids, sew-ins, wigs, etc.  Don't forget to actually PROTECT your hair.  Do a protein treatment before an after, Seal in moisture using Shea butter while braiding your hair, and nurture your scalp often to avoid dryness and the extension soaking up all the moisture from YOUR hair!!


After Installations Care:
  • Keep scalp and hair hydrated by co-washing hair( depends on the type of hair you use: Not good for all types), using a Leave-in spray conditioner and treating the scalp with oils.
My Hair Oil Mix:
  • 2 ounces Jojoba Oil
  • 2 ounces Coconut Oil
Easy Peasey Lemon Squeezey!!

Your Hair will thank you for it!!

Facial Day

Everyone needs a  pamper me day.  Whatever day you can fit a few hours to pamper yourself, TAKE IT!!!!! 

So, this past Sunday, some friends and I had an at home Facial Day!!

The recipes I used:
How to give yourself a facial.

Start off with a facial steam, using either a facial steamer or a bowl and a towel.  Follow with a cleaner, facial mask, toner and moisturizer.

Instructions:
  1. Boil 2 cups of water and pour into a plastic bowl with two green tea bags.
  2. After tea has fully steeped, remove and add a few drops of  lavender (relaxing aroma) and peppermint essential oil ( open up nasal passages)
  3. Place face over bowl and cover with towel (Steam your face for no more than 15 minutes)
  4. Gently Use a facial brush to clean pours and exfoliate (use circular motions)
  5. Use apple cleanser to clean your face.
  6. Apply clay mask and let sit for 20 minutes or until dry. Rinse with warm water
  7. Wipe face with toner
  8. Apply moisturizer of choice.
           Treat Yourself!!
    Pictured: Sugar Cookies with cream cheese and blueberries


Facial Steam!!!
The peppermint was very invigorating and opened up our sinuses!!
                                                  

Sunday, September 26, 2010

Smooth Kissable Lips


This is a quick and easy way to make your lips smooth, soft and kissable!!!

  1. Take a dab of honey and spread across your lips.
  2. Using a lip brush or tooth brush =, gently scrub your lips.
  3. Wipe lips and Voila,, smooth kissable lips!!
  4. Apply your moisturizer!!

Thursday, September 23, 2010

Mint Toner


This is a cool and refreshing toner for normal-to-oily skin.

Ingredients:
  • 1 cup distilled water
  • 2 mint tea bags
  • 1 teaspoon apple cider vinegar
Instructions:

  1. Bring water to a boil.
  2. Add tea bags and turn off heat
  3. Let sit for ten minutes, and remove tea bags.
  4. Pour tea into clean bowl and add ACV
  5. Let Cool
Application:

After cleaning your face with desired cleaner, toner over your face with a cotton ball, in the evening.

Curly Pudding/Flaxseed Cream

I posted a recipe for whipped shea butter that can be used both on your hair and body.  But another way to use shea butter is to make a curly pudding by adding eco styler gel or flax seed gel to help hold and define your curl pattern.  This pudding is moisturizing, sealing/protective and fights frizz with hold!!!


Tools Needed:
  1. Blender or Mixer
  2. Measuring Cup
  3. Spoon
  4. Bowl/Container of choice
Ingredients:
  1. Unrefined Shea Butter
  2. Jojoba Oil  and EVOO ( Extra Virgin Olive Oil)
  3. Aloe Vera Gel
  4. Flax Seed Gel or EcoStyler Gel w/ olive oil 
  5. Vegetable Glycerin
  6. Tea Tree Oil or Honey
  7. Essential Oil

Instructions:
  • Take 1/2 cups of unrefined Shea butter and place in blender  ( You can soften the Shea butter by heating in the microwave for 30 second NOTE:  Do Not melt all the way)
  • Add 2 TBSP Jojoba Oil and 2 Tbsp EVOO.  Be careful to not add too much, It will make your mix oily; Mix
  • Add a few tablespoons of Aloe Vera Gel; Mix
  • Add 1/4 cup of EcoStyler Gel/Flax seed gel. Mix
  • Add 1 teaspoon of Vegetable Glycerin(humectant), Mix
    • Be Careful not to add too much, V. Glycerin has a very thick consistency, A little goes a long way
    • V. Glycerin should not be used in cold months since it is an humectant and pulls moisture from the air.  This will make your hair hard.
  • Add 10 drops of tea Tree oil or tablespoon of honey:MIX (preservative)
    • Tea tree oil has a very strong smell that many may not like so use honey instead. 
    • This will keep your natural products from molding.  Also avoid water mixing in as well.
  • Add essential oil of your choice for fragrance; MIX
    • Lavender, Lemongrass, etc
This mix should last you about a month with eco styler gel and only 3 days-week with flaxseed gel(w/ refrigeration)!!!

Get creative and play with different oils in your mixes, and let me know how they worked for you.

Make-Up Remover

A simple, cheap way to remove makeup is using vegetable oils.  I know the thought of using an oil to clean your face sounds backwards, but the oils actually remove greasy dirt and make-up from the body.  Oils function as solvent by dissolving the grime on your face and making it easy to wipe away. 

A few Types of Vegetable Oil:
  • Jojoba Oil
  • Sweet Almond Oil
  • Apricot Oil
  • Olive oil
  • Coconut Oil
These oils can either be mixed to make the perfect blend for your skin or used alone.

My blend:

  1. Take 3 tablespoons of Jojoba oil, Coconut Oil and Olive oil and mix.
  2. Add Lavender Essential Oil (or of your choice)
  3. Stir mixture to blend oils
  4. Pour mixture into a glass bottle.
Application:

  1. Pour a small amount of oil mixture into clean and dry hands
  2. Gently massage oils onto your face
  3. Let oil mixture work its magic for a few minutes
  4. Take cotton pad or warm cloth and gently remove the oil
This oil is good for water proof mascara and make-up!!

Enjoy!

Wednesday, September 22, 2010

Hair Holding Spritz

I recently made a post about Flaxseed Hair Gel and curl definition.  Well, it also makes a great natural hair holding spritz.

Ingredients:
  1. Flaxseeds
  2. Distilled Water
  3. Vegetable Glycerin
  4. Roe/Orange Flower Water/ Essential Oil
  5. Spritz Bottle
Instructions
  1. Soak 1 tablespoon of Flaxseeds in 1 cup of distilled water for 15 minutes
  2. Add 1/2 teaspoon of vegetable glycerin
  3. Add 1 tablespoon of rose water/orange flower/essential oil
  4. Strain seeds and pour into spritz bottle
Keep Refrigerated!!

Voila!!  An all natural hair spray without all the chemicals and heavy build-up.

To apply bend over and spray troughout hair.  This will assist with giving the hair volume. 

Pimple Be Gone

Acne is a never-ending battle, whether your outbreaks are daily, monthly, etc.  It can be a result of poor diet, stress, inadequate rest, and so much more.  Well, here's a natural and simple way to get rid of that pimple.  (This works exactly like store bought spot creams/treatments)

Pimple Be Gone Mask

Apply this mask directly to problem areas only.  Cosmetic Clay is cleansing, draws out toxins and is a anti-inflammatory.

Ingredients:
  1. Bentonite Clay (There are several different types of cosmetic clay you can use)
  2. Freshly squeezed lemon juice or apple cider vinegar ( would not use lemon if your skin type is dry)

Instructions:
  1. Take 2 Tablespoons of Clay and place in a non-metal bowl
  2. Add 2 tablespoons of ACV and mix with non-metal utensil
  3. Mix Clay and ACV until it makes a smooth paste
  4. Apply to problem spots and let dry
  5. Rinse with warm water
This mix can also be used as a full facial if desired and depending on your skin type, you can add oils and/or essential oils for aromatherapy.  Great for a full facial detox and poor deep pore cleaning.

Note:  However much clay used, use equal parts water and/or AVC!!!

Store leftovers in refrigerator.  (Should last a month!!!!)

Tuesday, September 14, 2010

Just Add Peppermint Oil


Hair Growth is very important and always in the back of every woman's head.  Peppermint Oil is great for this!!!

 
Peppermint not only feels good on your scalp, but it promotes scalp circulation and stimulation, thus hair growth.

 
Add Peppermint Oil to your conditioners, oils, shampoo.  A few drops go a long way, avoid overdoing it!!

 
Co-wash your hair as normal and/or add a scalp massage. Rinse conditioner with cool water.


Avoid going outside too soon on cold days!

Some other Cool ways to use Peppermint:

  • Facial Toners
  • Muscle Ache Cream/ Salves ( makes your skin tingle and gives warm & cooling sensation)
  • Facial Cream
  • Facial Steam
  • Use with air Humidifier
  • Mouth freshening mist

However you use it remember a little goes a long way,  Peppermint essential oil is very strong!

Enjoy!

Monday, September 13, 2010

Apple Cider Vinegar(ACV) Rinse

Apple Cider Vinegar is very beneficial for the hair.

Ingredients:
  • Water
  • Organic/RAW Apple Cider Vinegar

Instructions:

  • Co- Wash your hair in Sections to prevent unnecessary breakage (4 or more depending on length)
  • Rinse out all Conditioner (USE COOL WATER ONLY)
    • Cool Water closes the hair follicles and traps moisture from conditioner)
  • Take ACV mix (1-2 tablespoon per cup of water) and pour over entire head
    • (adjust ACV amount to your hair preference)
  • Let sit for 5-10 minutes( Usually
  • Rinse hair with COOL water (this helps hair retain moisture)
    • May have a vinegar smell, but it will fade)
Benefits:

  • Helps smooth hair cuticles and protects hair from damage
  • Remove product buildup
  • Restore hair & scalp PH balance
  • promotes blood circulation for hair growth
  • Gives hair sheen
  • Assists with frizz control
  • Helps maintain moisture
Remember ACV is an Acid and should not be use too often

Saturday, September 11, 2010

Facial Mist

This is a all natural facial mist that is not only refreshing, cleanses your face, but helps set your make-up beautifully while giving you a glow and dewy look!!!

Ms. DIY Facial Mist


Ingredients:

  • Witch Hazel ( good for oily skin)
  • Rose Water
  • Green Tea
  • Aloe Vera (liquid)
  • Distilled Water
  • Essential Oil
Instructions:

  1. Pour 1/3 cup Witch Hazel into measuring cup ( I used Thayers Rose Petal Witch Hazel with Aloe Vera )
  2. Add 3 tablespoons of Green Tea to Witch Hazel
  3. Add a few tablespoons of distilled water ( Distilled water will not mold in closed bottle)
  4. Add a few drops of Essential Oil for fragrance.
  5. Mix and pour into 2 oz spritz bottle ( These bottles can be found in the travel size section of your local drugstore)
Uses:

Skin Refresher & Moisturizer:  Just spray on face lightly and let dry on it on:

Facial Cleanser:  Spray onto face and dab lightly with Cotton swab.  ( This mist will not replace regular wash, but good for on the go and removal of excess oil or dirt through out the day)

Setting Make-up:  After apply make-up, Lightly spritz face and let dry ( Do Not Touch)  This will make your make-up look more natural, vibrant and last longer.

Flaxseed Gel ( Curl Definition)

There are so many product out there that say they define your curls and fight frizz.  But if you have tried or researched these products they can be expensive ( around $50 a jar)


Flax seed Gel provides the same if not better results as those expensive natural products without may harsh chemicals.

Tools:
  • Bowl
  • Pot
  • Strainer
  • Measuring Cup
  • Container
Ingredients:
  • 1 cups distilled water
  • 1/4 cup Flax seeds
  • Aloe Vera Gel
  • Essential Oil
  • Vegetable Glycerin (optional)
  • Jojoba Oil
  • Tea Tree Oil

Instruction:
  1. Take a pot and fill with two cups of water
  2. Add 1/4 cup of Flax seeds.  Bring to a boil and let it cook for 10-15 minutes.
  3. Stir mixture while cooking; Mixture will form a frothy foam on the top when done.
    1. Do NOT let mixture over cook, The mixture will gel and will be virtuously impossible to strain.
  4. Pour mixture into strainer over a bowl.  Mixture should still be liquid and easy to pour.
  5. After straining add ingredients
    1. 1 tablespoon of Aloe Vera Gel (provides hold, while adding moisture_
    2. 1 tablespoon of V. Glycerin ( Humectant)
    3. 1 tablespoon Jojoba Oil ( add moisture, prevents crunchy and dry curls) if using EO mix with carrier before adding
    4. Add few drops of  Tea Tree Oil (preservative)
  6. Stir in ingredients into mixture
  7. Let Cool for 5 minutes or until mixture gels
  8. Pour mixture into container.  Voila!!
KEEP REFRIGERATED (unfortunaley, this great natural gel only lasts 3 days to a week, maybe refrigerated)!


Don't let the consistency scare you!!

After co-washing hair and leave in conditioner, Shingle hair in sections or use in two strand twists.

Results:


Whipped Shea Butter

Shea butter can be very thick and hard to use in its natural state, So I whip mine to make the consistency easier to use.  As posted before, Shea butter is good for both your skin and hair.  This is my whipped Shea butter for hair.  See Shea butter post for benefits.

Tools Needed:
  1. Blender or Mixer
  2. Measuring Cup
  3. Spatula/Spoon
  4. Bowl/Container of choice
Ingredients:
  1. Unrefined Shea Butter
  2. Coconut Oil and EVOO ( Extra Virgin Olive Oil)
  3. Aloe Vera Gel
  4. Vegetable Glycerin
  5. Tea Tree Oil or Honey
  6. Essential Oil

Instructions:
  • Take 1/2 cups of unrefined Shea butter and place in blender  ( You can soften the Shea butter by heating in the microwave for 30 second NOTE:  Do Not melt all the way)
  • Add 1/3 cup of Coconut Oil and EVOO.  Be careful to not add too much, It will make your mix oily; Mix
  • Add a few tablespoons of Aloe Vera Gel; Mix
  • Add 1 tablespoon of Vegetable Glycerin(humectant), Mix
    • Be Careful not to add too much, V. Glycerin has a very thick consistency, A little goes a long way
    • V. Glycerin should not be used in cold months since it is an humectant and pulls moisture from the air.  This will make your hair hard.
  • Add 10 drops of tea Tree oil or tablespoon of honey:MIX (preservative)
    • Tea tree oil has a very strong smell that many may not like so use honey instead. 
    • This will keep your natural products from molding.  Also avoid water mixing in as well.
  • Add essential oil of your choice for fragrance; MIX
    • Lavender, Lemongrass, grapeseed oil, etc
This mix should last you about a month!!!

Get creative and play with different oils in your mixes, and let me know how they worked for you.

Thursday, September 9, 2010

Shea Butter


Shea butter is a very good for both your hair and skin!!!! And a little goes a long way!

Benefits of Shea butter:

Skin
  • Skin Moisturizer ( Face and body)
  • Dry skin relief (great for winter)
  • Blemish and Wrinkles
  • Sunburn
  • Soften rough skin (feet, hands,etc)
  • Reduce Acne
  • Pregnancy Stretch Mark Prevention
  • Razor bumps
  • Even skin tone
  • Eliminating scalp irritation due to chemical processing
  • Eczema
  • Give a cooling effect
Hair
  • Sealing your ends ( split end prevention/protection)
  • Returning hair luster
  • Reduce shedding from dry hair
  • Weather protection (wind, cold, heat, humidity)
  • Moisturizer
  • Dry Scalp treatment
  • Does not Clog pores
  • Pomade: Smooth edges without using drying gels
  • Smooths hair cuticles during a wet set (twist out, braid out, wash n go)

I prefer my Shea Butter Whipped because it's just easier to use.

Natural Hair Scares Me!!!

"Natural Hair is NOT for me, this stuff is nappy or I don't have good hair like you."

I have heard this statement and /or seen frowning faces when discussing going natural.  IT"S NOT AS BAD AS YOU THINK!!!!  Give up on the creamy crack, your hair will thank you for it in the long run.


Being Natural does not mean that your only hairstyle options are Afro, and umm, let me see Afro.  You can wear your hair bone straight, rods, twisted, roller sets, braids, pony tails.  If you ask me, you actually have more options natural than permed.  It really is just taking the time to learn how to take care of your hair differently. 

Benefits of Natural hair:

1.  SAVE MONEY $$$
2. More versatility
3.  No more burned scalps.
4.  Decreased thinning due to perms.
5.  Stronger & Healthier  Hair  ( Although I want you to understand natural does not mean it needs less care than permed hair.
6.  Removing damaging chemical from your daily hair regime
7.  Increased self- confidence
8.  Fun creating new hairstyles
9.  Supporting Community
10.  New appreciation and love for your curls/kinks!!!


Natural hair is not only a physical transition, but a mental one as well.  We as black women and men  have been fed certain images of beauty and it is hard at times to digest the new look ( I still have my days after 4 years).

Don't let people define what natural hair is to you.  You probably see alot of women's hair and have no idea that they are natural.

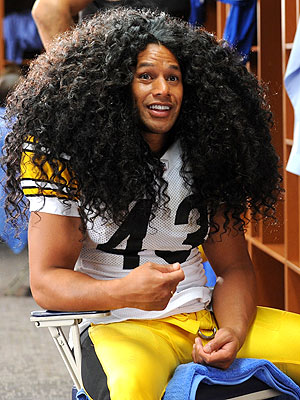
My Hair straight & Curly:


Tuesday, September 7, 2010

Minx Application

This is My first try at Minx application.  It is really a cool and somewhat easy process.  But Practice makes perfect, Right? 

I will be trying the Nail Rock brand soon!!!

Directions:

1.  Remove all nail polish and dehydrate nail
2.  Turn on your heat lamp/hair dryer and place your fingers and sheets under for 30 seconds. This will activate the adhesion
3.  Choose a minx size and place on nail bed, while still under heat lamp/hair dryer ( you can trim the edges for a perfect fit)
4.  Take a cuticle pusher/birchwood stick and rub entire minx, sealing the tipes and edges well.  Pull Minx end down
5.  Remove from the heat and allow to cool for one minute.
6.  Take your crystal file and in a straight downward motion file the minx at the tip until the end is removed.  If Minx is peelingat the tip slightly file the tips on the top downward.
7.  To fix any creases etc, returnt to heat source and fix by rubbing with cuticle pusher.

Minx should last about 2 weeks depending on wear.  Remove with heat source.

It sounds easy, but take practice and patience.


Ms. DIY

Sealing Your Ends/Avoiding Split Ends

For all those women out there trying to maintain length  and/or obatin APL hair or what ever lentgh desired, the trick is simply keeping your hair moisturized and sealing your ends.  Take care of your tresses and you will get your desired results.  There is no "treatment" to fix split ends except some good ol' scissors, lol.


Split ends are counter-productive when it comes to growiung out your hair, so do everything you can do avoid them.  Some suggest that you trim your ends every 6 weeks, but if you take care of your hair daily you can go for two to three months.

What to look for:


Products to Use:

Olive Oil
Coconut Oil
Shea Butter( I prefer mine whipped)

1. Apply these one of these products at night before you go to bed and protect your hair with satin cap and/or satin pillow case.

2. Apply after and wash-n-go and leave-in conditioner focusing on your ends.

3. Apply during your wet set, i.e. twisting or braiding.  This not only protects your ends from fraying, but also assists in smoothing your cuticle and preventing frizzy twist outs and braid outs.

Monday, September 6, 2010

Nail Rock vs. Minx

Ladies, We all know that daily beauty maintenace can be a hassel at times, as well as expensive.  Basic Manicures and Pedicures cost $40 and-up.  (suggested done bi-weekly)

The most recent fad in nail care is Minx nails.  You see all the celebrities wearing it including Rihanna, Beyonce, Lagy Ga Ga and so on.  But it's a little pricey to get done on a regular basis.


Minx (www.minxnails.com/) a very popular nail application for both nails and toes.  For the fashionista on a budget one application can be a little pricey($150- and up) to do on a regular basis or at all. 


Nail Rock(www.nailrock.com) is offering a similiar if not exact product as minx for a great price with application instructions.  They can be found on http://www.asos.com/ and www.topshop.com/.(Coming Soon) 

One pack of nail rock appliques cost $10.95 plus shipping.  Sounds like a deal to me!

I have ordered three pair and excited to see the results!!  Stay tuned for results!

Introduction

I am an avid reader of blogs, So I have decided to create one of my own.  The purpose of this blog is to share my adventures of fashion and DIY health and beauty.