Phase 2
Rosemary Extract .3%
Tea Tree Oil .3%
Lavender EO .6%
Instructions:
Make Herbal Infusion (1 cup dried/powedered herbs and 8oz Carrier Oil)
Using a double boiler gently heat the oil and herbs for 2 hours, stirring occasionally with stainless steel spoon Make sure heat is low so as not to cook the herbs and oil, thus causing rancidity.
Let cool and then strain infusion and place in cobalt glass jar, label with date. ( Keep Refrigerated & Should last 3 monthes)
Measure out each oil using a digital scale and place into stainless steel bowl.
For example, jojoba oil 23.4% of 4oz would = .94oz.
Measure out Beeswax
Place Oil mixture into double boiler and add beeswax. Let mixture heat on medium until beeswax melts. Not too hot though
Measure out each part of phase 2 and place into stainless steel bowl
Let oil mixture cool a little and add Vitamin E Oil, Stir
Add Oil & beeswax mixture to Phase 2, Stir
Add EO if desired
Allow mixture to cool and place into sterilized jar. Label with date.
Avoid getting water into mixture this has no preservative.
It seems that whatever hair issues I have, Naptural85 creates a video and it works! Her most recent video was very helpful. I have been experiencing dry and rough ends no matter what I did. I have been washing with the Conditioner bars recently, but I mainly use the mud wash. I then follow up with aloe vera gel/juice and my shea butter mix for sealing. My hair is always dry by the next day, especially my ends. And before you ask, yes I sleep with a satin scarf and pillowcase, lol! I have even tried incoporating creamy leave-ins back into my regimen.
I would have to drench my ends in water and/or flaxseed gel and seal again with shea butter. And only after three days of doing this would my end soften, maybe and be greasy,ugh. Plus, after a week of working out in the gym, I have to at least rinse my hair and start this dang process all over again, smh! This also stops me from ever really fully stretching my hair and attaining any length.
Anyhoo, I tried her deep conditioner method and after washing I covered my hair, focusing on the ends, with coconut oil. I then placed a shower cap over my hair and then tied it with a satin scarf to hold my body heat. I kept the shower cap on for a few hours and then proceeded to french twist my hair and seal with solid lanolin( giving this a try, learn more here about the benefits). I did not rinse at all because coconut oil penetrates the hair strands and does not seal out moisture so I found no reason to rinse. My ends were soft from the get go and they still are four days later, I'm loving it!
I had originally planned to do this treatment at my gyms steam room (huetiful steamer on a budget, lol), but that old trusty Chicago weather snowed me in. I also remember reading somewhere that my hair idol, Tracee Ellis Ross, did a similar treatment in her steam room and loves it. Relaxing after a hard workout and treating your hair sounds good to me!
Next time I will do the treatment in a steam room using Vatika Coconut oil, but if I'm in a rush or can't make it to my gym, I will do the baggy method at home.
What I find funny is, I have tried so many products and recipes, and simple coconut oil and water did the trick. Just reinforcing my Keep it Simple mantra!
P.S I'm getting much better on my IJ'ism (ingredients junkie). I only have two saved carts at Mountain Rose Herbs & Texas Naturals Supply. That's an improvement for me, lol! Still working on cutting down on things in regimen. My goal is to limit myself to as much local items as possible and only purchase a few of my favorite premade products online.
I recently found a recipe on Lola Zabeth and I just had to try it. I made a few adjustments to her recipe because I did not want the darkening effect of cocoa powder since I like the red from my henna treatments. Here's what I did.
Ingredients:
5oz Rhassoul Clay
2oz unrefined Cocoa Butter
2oz (Coconut Oil & Olive Oil; I ran out of olive oil,lol)
1oz Nettle leaf and hibiscus flower powder
2tbs Cassia powder
2 tsp Vitamin E Oil
2nd try using Lola'recipe
1st try using nettle & hibiscus powder
Ok, I have tried creating these bars 2x. Once following Lola's recipe and the one above. I also tried the Anita Grant's rhassoul deep condish bars for comparison and I must say I don't care for it. The only time I sort of liked the results was when I mixed my recipe with flaxseed liquid, except the rinse out was hard due to the nettle leaves, but my hair detangled and was soft and conditioned.
I know I have mentioned these bars on FB and I didn't want to leave you guys hanging, but I didn't like them. My results were just meh! I need more slip(probably why I liked the flaxseed liquid). I've tried rhassoul clay and bentonite clay, cocoa powder, powdered herbs, olive oil, coconut oil...ugh! I'm going to try one mo' gine and then I quite.
Even though my hair isn't really liking the recipe, by all means give it a try and share your results. My experience may not be your own. and if you have any suggestion, I'm definitely open. I might remove the cassia from the recipe.
I have made several different posts about making lip products so here is a summary and links to all my posts regarding creating your own lip products.
Depending on your preference and desired results, there are several different methods of lip product application and several ways to create formulas. The possibilities are endless depending on your favorite ingredients. Whether you are keeping it sipmle and just using oils and wax or adding the more complex conditiong aagents like cetyl alchol or want a harder product, etc. See here for possible lipstick formula and comercial comparison.
Preservative/Anti-oxidants: Currently only parabans are approved-go figure. Plus, many popular natural brands only add antioxidants (vitamen e oil & rosemary extract, etc)
I have read people recommend phenexthanol products, but in my research I get conflicting info about toxicity regarding lip safety so, I'm staying away from it. Keep in mind much of our lip procucts are ingested due to its location. I know we aren't literally eating our lip stick but hwo doesn;t lick their lios on a occasyion or eat/drink while wearing lip gloss...anyhoo!
If you don't want to bother with creating your own base, just buy one. Several companies out there make lipstick, lipgloss and lip balm bases. I am currently only making my own because I have all this dang beeswax to use, lol!
Methods of application
Lip Gloss
Lips Stain
Lip Balm
Medicated Lip Balm
UV Potection Lip Balm
Lipstick
Liquid Lip Colors (new trend)
sort of a lipstick and Lip gloss hybrid
Product safety:To be safe discard products every 2 weeks(pots)-2monthes depending on application method and oils used.
As always I recommed eliminating hand in jar and using sterile utensils during formulation. For your softer liquid formulas use pots, lip gloss tubes (squeezies and brush applicators), roll-on bottles. If using a lip pot, use a lip brush (keep clean) or disposable q-tips or lip brushes. For your harder recipes use lip balm and lipstick tubes.
25 drops of four essential oils you like (approximately 5-7 drops of each oil). Since wax dulls the scent of many perfume top notes, use a stronger concentration of these—common top notes are citrus and ginger.
Generous 1/2 teaspoon grated beeswax (available at health food stores or online)
Eye Droppers
Non-metal, heat-safe bowl
Small cup
Empty compact, pillbox, locket, or pocket watch necklace
Instructions
Pour jojoba oil into your small cup. Add all the drops of essential oils and mix.
In your heat-safe container, melt the beeswax over the stove top or 5-10 seconds.
Stir the beeswax. After it's completely liquified, mix with the jojoba/perfume blend.
Reheat the entire blend for just 10 seconds over the stove and continue to stir.
Prepare your empty compact and immediately pour the finished mixture in.
Let your solid perfume cool completely, then enjoy your new custom scent! The texture should feel like a soft lipstick or balm.
This was the recipe that I used to create the lip balm above. I crossed out two ingredients, because I previously listed those ingredients for personalization and I did not use those ingredients when I made my base.
To make the lotion bar I simply melted the balm base in a double boiler and added about 1.5 ounces beeswax. When fully melted I poured mixture into a silicone mold, added .04oz EO Blend (2 sample sizes) of an EO blend I ordered from Essential Wholesale, stirred and let sit overnight.
Note: I had about 16ounces of balm base, so adjust beeswax amount accordingly or just use sample recipe below.
Results:
This bar is huge, lol, but it smells so good, I will be ordering more of those EO blends, I love anything with Neroli EO! I made this with the intention of just trying out the lotion bar recipe, but I added so much EO that it doubles as a light solid perfume as well.
Here is a another simple recipe for a lotion bar as well.
Ingredients:
3 ounces beeswax
2 ounces cocoa butter
3 ounces sweet almond oil
Lip Gloss
50% Lip balm
50% Versagel
10-20% Mica/Pigment/Dye of total lip gloss weight
The more color the more pigmentation. I am still learning about making my lip gloss more opaqie. My goal is to create a creamy lip color. Mica alone will color your lip gloss, but be tranluscent in application.
To learn more about coloring your lip products go here
As for this recipe it has good amount of shine and staying power. I feel the gloss still on my lips after awhile.
Depending on your desired results, there are a couple different ways to color your lip products. It was hard for me to find this information in one location so I thought I would try and share my findings in ONE location, lol.
There are basically three types of lip products you can make in regards to coloring, Opaque, Translucent, or Staining.
First what is used to color lip products & their differences:
Pigments- color additives that don't dissolve in product and kind of coats the lips; think paint.
Mica- natural minerals that add shimmer and shine
Dyes- color additive that dissolve and stain lips
How can you obtain these results?
Opaque
add Zinc Oxide or Titanium Dioxide to your color formulations ( also provides UV protection)
Add more color: add 10-20% of your lip product weight
See explanation of different coloring ingredients here
Translucent
just add mica
Mica will color the gloss but will only add shine and sparkle to your lips during application
Staining
add dyes, think Easter eggs or the current lip stain trend
When looking for your color additives please make sure they are lip safe and approved. Also, look at the ingredients, some colors may very well be combinations of dyes, pigments and mica already.
See below for suppliers!
Depending on the planned application method of your lip color will determine what color additives are needed. According to TKB Tradings:
"Here's the bottom line: A liquid lip gloss will be colored only with dyes. A solid lip pencil will probably be colored only with pigments. Meanwhile, the typical lip balm/lip stick will usually be colored with a blend of dyes, pigments and micas so as to get the best of all worlds. In total, the color portion of a lip products recipe will usually be about 10-20%." Source
Suppliers: These are the only places I have ordered from
Since my hair is all braided up and honestly I have kind of tired of creating new products for my hair and skin ( body & facial cleaners) I have moved onto lips and nails, makeup and possibly candles!
This post is about lip products. I've been cooking up some ideas and it's time to test them out now that I have ALL the supplies!
Soon I will be making all these types of lip balms & Lip colors below:
Coffee Grinder/Pestle & Mortar Rosemary Extract/Vitamen E Oil
Man!! This seems like alot of work, but I'm impatient and I want to test out all these theories and decide on my favorite one for lip application. I am always interested in saving money so, some would be a cheaper habit to maintain than others, i.e. Vaseline. I am testing for feel, staying powder and pigmentation.
As for the preservative, I say this is optional, but if you decide to opt out, try to make formulation for jars that do not require as much hand in jar or lip brush contamination. You can also just make small amounts and throw away left overs after so much time. Plus, these formulation are water free, which generally do not require preservatives. Be careful not to get water in balm/glosses.
Stay tuned for my results!!
This blog and post is meant for fun only, not for sell. Please do your own research and practice GMP and learn about preservation. These products were not tested for sell.
This is my most recent lip balm creation. It is the same as my previous recipe, except I added lanolin for it's moisturization and assistance w/ color adhesion in lip products.
Results: This lip balm is great, but my intentions to use it as a base for my liquid(creamy) lip colors is not so great since I will have to reheat the base in order to add color and the versagel. I only make 1 lip color at a time to avoid wasting product and to experiment while I am learning the tricks to coloring lip products. The balm, due to the butters, crytalizes from too much heating. If you just want to make a nice balm, this recipe is great as long as you melt the butters once and slowly. It is very soft during application and offers a slight shine to lips and lasts. You can also add color to tint this balm as well.
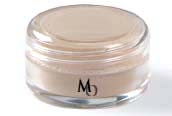
I have been testing a recently order primer sample for the past few days and I noticed at the end of the day, I didn't have shiny forehead. I'm usually VERY shiny by the time I get to the gym, ugh! So, this powder is a winner so far!
Why am I posting this? This is not a prodcut review, but rather a you can make this "product" at home for a fraction of the price.
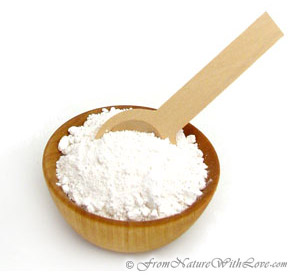
The powders ingredients are....drumroll.....kaolnite. Now isn't that just the INCI name for kaolin clay??? So of course I googled it to make sure my hypothesis was correct and BOOM it was. According to Mountain Rose Herbs, Kaolin clay is:
So this 2 gram(.07 ounces) sample that I just paid $3.00 plus shipping costs about $4.00 for 8 ounces. Shut the front door! See this is why I give some natural companies the side eye, like really!?! I found several companies that sold this very powder with varying ingredients for $12+ for kaolin clay in a jar w/ a sifter.
Some other variations to this finishing powder/primer/viel include cornstarch, rice powder, arrowroot powder(sensitive to conrtsatrch), titaniam dioxide, etc. There are some other minerals that can be mixed, but I don't plan on figuring out the correct formulas for using them. For now the kaolin clay works fine, but when the summer hits, I may up the anty and add some other minerals or just purchase this one oily skin powder I got mine eys on, lol. This powder has those above mention minerals I'm not trying to figure out proper formulations with at the moment. (I'm currently in a just buy it mood right, now).
Long strory short, try Kaolin Clay as a great primer and oil blotting finishing powder that can be used alone or with makeup.
So I have installed some box braids and although this is a protective style with extension, I still must take care of my hair and scalp, maybe even more so. So this is my planned regimen and "products".
P.S. I was so tempted to just go to my local BSS and get some braid spray or curl activator. Those are the only products I have EVER used on braids with extension, lol!
Daily Moisturizing Sprayevery 1-2 days (P.S. I make only enough per moisturizing session because I use tap water and use no preservatives)
Every time I Spray on my cologne, they be like girl what you got on,!!
So I started looking into perfume (kinda guilted(sp?) into it,lol) and didn't want to use all the crazy chemical laden sprays and itchy creams that make me sneeze so I picked up my Aromatherapy book( need to buy another one, my current one is very limited). I'm cool with smelling like lavender or some citrus-e like flavor,lol!
So in my research I found three natural ways to make your own natural smell goods: spray (infusion & alcohol based), solid, oil. Out of the three, I have tried perfume oil and I'm not sure I did it right because the smell does not last at all. I also purchased a solid perfume from LUSH, which was NOT natural, ugh random purchases always get me! Anyhoo, I will try making my own solid perfume soon. I will not be trying either spray because I'm not trying to worry about proper preservation of water based products, finding 100 proof pure grain alcohol AND sprays make me sneeze. Sprays seem to permeate around you ALL day, that's why they don't allow you to apply any perfumes before laser eye surgery for example, lol.
In this post I will explain the basics to making your own natural fragrance. To learn about different recipes & application, visit here
Spray (water & alcohol based)
Solid Perfume
Perfume Oils
How to:
You can either use fragrance oil or essential oils.
Fragrance oils tend to be synthetic, however I have seen some sellers say they have natural fragrance oils, but I'm not sure about those.
First figure out what scent your going for, citrus, sexy, floral, relaxing, woodsy, spicy or a combination.
Visit your local health foods store and smell all their EO's and absolute($$) to figure out what you like ( My new found love is Neroli)
Choose your top note, middle note and base note.
Top Note: This is the scent you notice first, but it doesn't last long because it evaporates quickest. Top notes are a small portion of the final blend and include fresh, light citrus scents using such oils as bergamot, neroli, lemon, lime, rosemary, orange or mint. Middle Note: This links the base and top scents and determines the fragrance family. Middle notes include flowery essential oils, such as jasmine, rose germanium and ylang-ylang. Base Note or Fixative: This scent lasts the longest, adds fullness and carries the other scents. Derived from balsams, roots, resins and wood, bases include such oils as sandalwood, vetiver and patchouli and tend to be dark, heavy and sweet.
When purchasing EO's websites/aromatherapy books will tell you what note they are and recommend other EO's to blend them with.
Some wholesalers do the blending for you and sell EO blends pre-made (find a local aromatherapy shop near you to help)
To keep things simple, you can use one EO, i.e. lavender to make your fragrance
Create your blend taking your time to test how every drop effects the fragrance
Water- will need preservative and emulsifier(or just shake before each application)
Solid Perfume (oil & beeswax)
Store Oil & Essential Oils in UV safe glass jar only
Let sit for 1 week to allow scent to strengthen optional
Side note: I also found aromatherapy workshops/stores that make private appointment to assist you in creating your own personal fragrance blend. They will then keep a file of your fragrance that you name and whenever you need a refill they make it for you. Cool huh!
Cold weather equals a need for heavier oils and/or butters, so here is the easy Ayurvedic butter I whipped up as promised!
FYI- I call this the "lazy way" because I didn't make any of my own oil infusions. Instead I used purchased Ayurvedic oils.
I didn't really formulate/measure this, but just poured until my heart felt content so bear w/me. Kicking myself for not taking the time to measure this recipe out, ugh!
4 tbsp Vatika Coconut Oil (ayurvedic coconut oil)
1/4 cup Cocoa Butter
1 Cup Shea Butter
1/4 Cup Mango Butter
1/3 Cup Bringraj Oil
1/3 cup Jojoba Oil & Almond Oil Blend w/ Grapefruit & Lavender EO
1 tsp Vitamin E Oil
1tsp Veggie Glycerin
I didn't want this butter to be to oily so I tried to keep the oilier oils to minimum.
Instruction:
Soften cocoa butter in double boiler
Measure & add each ingredient and add to glass or metal mixing bowl
Using hand mixer, blend ingredients until butter is soft in fluffy
Place butter in clean and sterilized jar for storage.
Be careful not to get water in butter to avoid mold.
I have used this butter for twist outs, mini twist, sealing my end, as a pomade and for my skin when in a rush lol!! And it Rocks!
Lip scrubs help removed dead skin, thus revealing smooth kissable lips!! This will help with dry, chapped lips, smooth lipstick or color application as well! I don't know about you, but I hate feeling that rough feeling when I rub my lips together and when my lipstick looks cracked.
Recipe #1
Brown Sugar
Raw Honey
Coconut Oil
Shea Butter
Aloe Vera Gel
FYI: I would keep this refrigerated becaue I used pure Aloe Vera Gel from Lily of the Dessert, which needs to be refrigerated.
So, I tried the DIY conditioner recipe, but of course I personalized it and confused the amounts of guar gum and xanthan gum, lol, so I made a gel, OOPS. Here's what I did and FYI I was being totally lazy and didn't do all that formulating so bare with me, lol.
Recipe:
4oz Distilled Water
2 tsp Shea Oil
1tsp Castor Oil
1tsp DL Panthenol conditioner
1 tsp Sodium Lactate humectant
1/4 tsp Guar Gum
1/4 tsp Extraordinary XG
First I want to explain the Extraordinary XG, this is a derivative of Xanthan Gum (XG) and I had some so I decided to use it( I don't like to waste), but it gave the mixture a jelly like consistency. I also used more oils, since my hair is very dry.
Instructions:
Mixed liquid ingredients in pyrex measuring cup
Add Oil(s)
Pour Liquid into blender
Start mixing liquid phase of recipe, while slowly adding in Guar Gum and/or XG( this will help w/ hydration of GG and XG and avoiding flakes)
Mix
Let sit for 2 minutes and blended some more (allows guar gum and XG time to hydrate)
Let sit for 5 minutes and blended some more
Poured into 4 oz plastic jar.
Refrigerate
There was some left overs so I used that to test the PH and twist my hair for a twist out. PH=7/7.5 ( these PH strips are not easy to read, ugh)
My Review and Recommendation:
Store mixture in a bottle with dispensable top to help reduce contamination since I used no preservatives( eliminates hand in jar)
Pour mixture into bottle before it fully thickens( makes transfer less messy and avoid contamination) or use the baggy method to transfer mixture
Eliminate the Extraordinary XG, makes mixture gel like instead of creamy leave-in
I personally would store in the refrigerator no more than a week and definitely not past 2 weeks because I use no preservatives, but you can add your own preservative to be safe.
It felt gooey too, kinda like Kinky Curly Custard , but it dries better on the hair ( no gooey sticky residue)
Add Guar Gum and/or Xg slowly,, don't just dump it in water phase
I tried this recipe for a twist out. I only dampened the hair with water for detangling and then applied the mixture. I must say this is more like a moisturizing gel. The hold is great and my twist out is very defined and moisturized. The only thing I would be aware of is applying too much( I can get heavy handed). It will flake up a little, but not very bad.( the flakes may also be due to my not following step 4 and just dumping GG and XG in still water, thus allowing it to clump a little)
I'm going to try using this mixture this weekend for my mini twists and as a base for a deep conditioner(I'll add more water, EVOO, Coconut Oil and maybe an egg). I might also try this for shingling style.
Update: I used this for both the deep conditioner and my mini twists. I liked the hold and as a moisturizer for my mini twist, but it caused flakes later own. As a base for a deep conditioner, not so much.
This video is really helpful in helping me figure out my hair regimen and always getting the desired results. PH is so important. Depending on what hair style you are trying to achieve, KimmayTube suggest the follow product PH levels for desired hair results.
Desired Hair Results
Fuller &Strecthed
PH Level = 6-7 (Neutral)
OR
Smooth & Curly Hair Cuticle
PH Level = 4-5.5 (Acidic)
As you saw here, I learned how to make my own hair conditioner. I first planned to use this method to only make my deep conditioner and with no concerns about PH levels, but after watching the video on the post, I figured, why not make a leave in too?
I was previously using the neutral method according to this video but looking for the results of using acidic products. My previous styling regimen was moisturize with water and seal it with oil. I mean I liked some of my twist outs, but somedays I wanted a smoother look.
The KimmayTube Leavein Recipe: Source
2 tablespoons of YOUR preferred conditioner (silicone free)
2 tablespoons of (Whole leaf version) Aloe Vera Juice with a pH 4.0 or 4.5
2 teaspoons of Castor Oil (optional. I sometimes do without it)
2 teaspoons of Jojoba Oil
Mix well.
What I don't like about this recipe is the store bought conditioner, since they all need some type of preservative and may contain synthetic ingredients, etc. So when creating your formulas, just try using acidic ingredients, i.e. aloe vera juice and test the final recipes PH to gage what results your recipe will give you..... Sounds like I might be doing my own experiment to test this theory out!!
You can use your own variations of her recipe, so I will take the general idea of the PH balanced product and create my own leave in and deep conditioner minus the store bought conditioner. Stay Tuned for my results!
I got inspiration for this recipe from my Ayurvedic Shea Butter Hot Oil Treatment post and going through my stash and finding all these un-used herbs and oils. This recipe can just be used for fun to switch up your usual butter recipes, on occasion! I usually don't like to use shea butter on my hair, but I'm going to give it another try since I might have been a little heavy handed before in application and as you know, a little goes a long way with Shea butter, lol!
Phase 2
Vitamin E Oil 1%
Rosemary Extract .3% Other Oils for making an Infusion: Coconut Oil, Olive Oil, Almond Oil, Grapeseed Oil', Sunflower Oil, Flax seed oil, Sesame oil
Instructions:
Make Herbal Infusion (1 cup dried/powedered herbs and 8oz Carrier Oil)
Using a double boiler gently heat the oil and herbs for 2 hours, stirring occasionally with stainless steel spoon Make sure heat is low so as not to cook the herbs and oil, thus causing rancidity.
Let cool and then strain infusion and place in cobalt glass jar, label with date. ( Keep Refrigerated or in cool area)
Measure out each oil using a digital scale and place into stainless steel bowl.
For example, jojoba oil 23.4% of 4oz would = .94oz.
Place Oil mixture into double boiler and add butters. Let mixture heat on low until butters melt. Not too hot though
Measure out each part of phase 2 and place into stainless steel bowl
Let oil mixture cool a little and add Vitamin E Oil, Stir
Add Phase 2, Stir
Allow mixture to cool and place into sterilized jar. Label with date.
I would make small amounts, especialy due to the herbs. My formulations are for my fun and have not been tested for sell, etc. Please practice GMP and avoid getting water in pomade to avoid mold!